



AI Video Prompts: Finish the Action Before the Clip Ends
AI Video Prompts: How to Make an Action Finish Before the Clip Ends
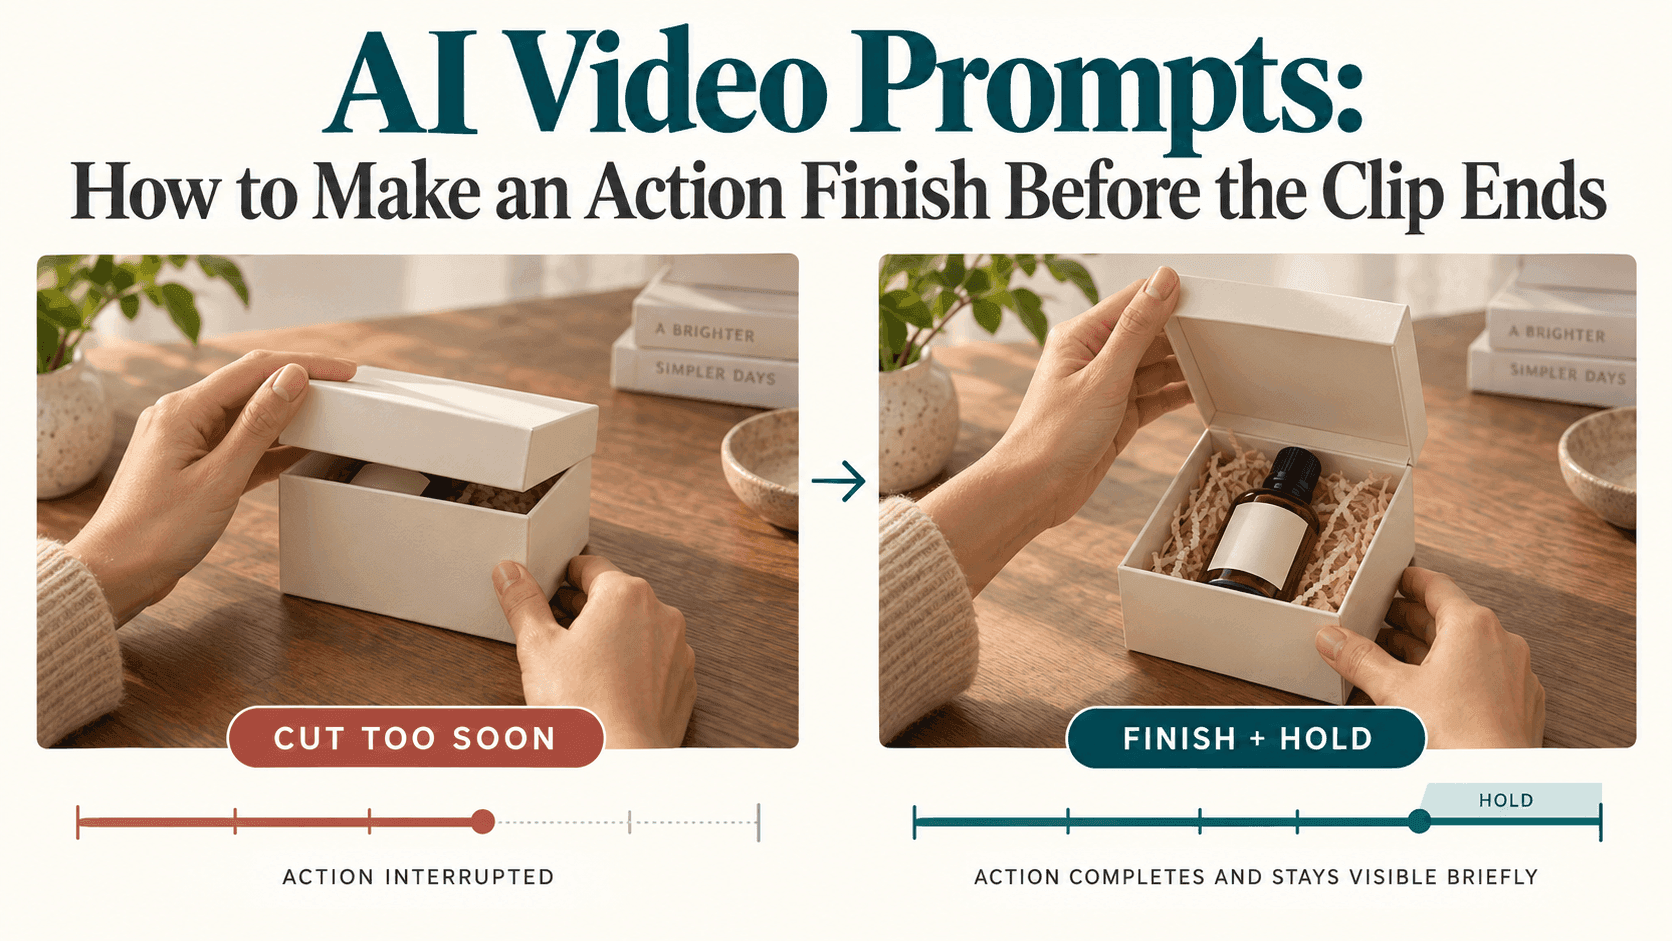
The lid lifts halfway. You catch a glimpse of the product inside. Then the video stops.
It’s an awkward result because so much of the shot may be fine. The lighting works, the hands look believable, and the box stays the right shape. You just never get the reveal you needed.
Adding “finish the action” to the prompt is one thing to try, but it leaves an important question unanswered: what should the finished action look like?
For a product reveal, opening the box is only part of the job. The viewer also needs to see what’s inside. That means the lid has to move far enough, the product has to remain in view, and the shot needs to stay there briefly before ending.
Write AI Video Prompts With the Last Usable Moment in Mind
Before describing the movement, imagine the frame where you would be happy to cut away.
For a gift box, that might be the lid held open with the product clearly visible. For someone sitting down, it’s the moment their weight has settled onto the chair. For a cup, it could simply be the cup held upright at chest height.
You don’t need an elaborate ending. You need to know where the movement is going.
Compare these two instructions:
A person slowly opens a gift box.
The person lifts the hinged lid until the product inside is clearly visible, then holds it open for a brief moment.
The second version gives you something concrete to check. If the lid still blocks the product when the clip ends, the shot hasn’t reached its intended finish.
It also avoids a small trap in the first version: “slowly.” That word might suit the mood, but it asks the model to spend time on the movement. If you only have a short clip, decide whether the slow reveal matters more than actually seeing the product.
These examples are starting points to adapt, not promises of a particular result.
Start Closer to the Part You Want to Show
A prompt can sound simple while asking for quite a lot:
A person walks into the room, approaches the table, smiles at the gift, unties the ribbon, and opens the box.
There’s nothing wrong with that sequence. It just contains much more than opening a box.
If the purpose is to show the product, you may not need the walk across the room or the smile. Start with the person already at the table. If the ribbon isn’t important, use a source image where it has already been removed.
That last part matters. You can’t assume the model will neatly skip a ribbon that is visibly holding the box shut. The starting image and the instructions need to agree.
Look at the source before rewriting the prompt. Are the hands close enough to the lid? Is there space above the box for it to open? Does the camera angle allow a view of the contents?
A lower camera angle might produce a beautiful photograph of the packaging while giving you a poor view inside it. In that case, a different source image may help more than another sentence about completing the reveal.
The same reasoning applies to other actions. If you want someone to sit, a photo of them standing directly in front of the chair is a more straightforward starting point than one showing them across the room. If you want a cup lifted, begin with it within reach.
Let the Finished Action Stay on Screen
There’s a difference between an action technically finishing and a shot feeling finished.
If the lid reaches its open position on the very last frame, the viewer has barely seen anything. You may also struggle to cut that shot into a sequence without making the movement feel interrupted.
Give the ending a little room:
After opening the lid, the person keeps it open. The camera remains on the revealed product for a brief moment.
You’re not asking the person to freeze. Small natural movements can remain. What matters is that they don’t immediately close the box, lift the product out, or start another action you didn’t need.
For a cup shot, the equivalent is “holds the cup upright at chest height.” For sitting down, it’s “remains comfortably seated after settling into the chair.”
This is also a useful way to spot an overloaded prompt. If every completed action immediately leads to another one, there may be no obvious place for the clip to end.
When the Timing Still Doesn’t Work
Watch the unsuccessful clip once at normal speed before changing anything. Where did the time go?
If the person spends the opening seconds looking around, remove that behavior from the request and describe a more direct start. If the movement is underway but painfully slow, check for wording such as “slow motion,” “gradually,” or “a long, dramatic reveal.”
If everything happens at a reasonable pace but the sequence still needs more time, choose a longer duration where available or split it into separate shots. There’s no benefit in forcing a walk, an unwrapping, and a reveal into a clip that can only accommodate one of them comfortably.
You can try rough timing instructions, too. Runway’s image-to-video guide describes sequences and approximate timestamps for its models. Treat those as guidance to test, rather than frame-accurate controls.
For example, asking for the main movement early and a brief hold afterward communicates a useful rhythm. It doesn’t guarantee that the lid will reach a particular angle at precisely three seconds.
Adding duration alone isn’t a guaranteed fix either. The model may use the extra time for a slower approach. Keep the endpoint in the prompt.
Three Prompts to Try With Suitable Starting Images
For a simple product reveal:
The hands open the hinged box lid in one continuous movement until the product inside is clearly visible. They keep the lid open briefly. The camera remains still, with the hands, box, and product in view.
For lifting a cup:
The seated person reaches for the nearby cup, grips its handle, and lifts it to chest height at a natural pace. They hold it upright for a brief moment.
For sitting down:
Standing directly in front of the chair, the person bends their knees and sits down in one continuous movement. Their weight settles onto the seat, and they remain comfortably seated.
Adapt the object positions and actions to what’s actually in your image. A prompt for a hinged lid won’t suit a box with a separate lift-off top.
Make One Change Before Generating Again
In Reveedo’s image-to-video workflow, you can upload an image, describe the motion, and choose from the settings available for the selected model.
For the next attempt, keep the source image and change one part of the request. Remove an unnecessary opening gesture, clarify the final position, or adjust the pace. If you change the image, model, camera move, and wording together, it becomes harder to tell what helped.
Once you have a version where the action finishes, watch what happens afterward. A little excess footage can be trimmed. A short pause may be exactly what you need for the edit.
But if the product never becomes visible, freezing the final frame won’t rescue the reveal. You still need a different generation or a different shot.
The practical test is simple: can you cut away without making the viewer feel they missed the important part? When the answer is yes, you have an ending.