



AI Shadow Generator: Add Natural Shadows to Product Photos
AI Shadow Generator: How to Add Natural Shadows to Product Photos
Bottles on a white background can sometimes look like they are floating.
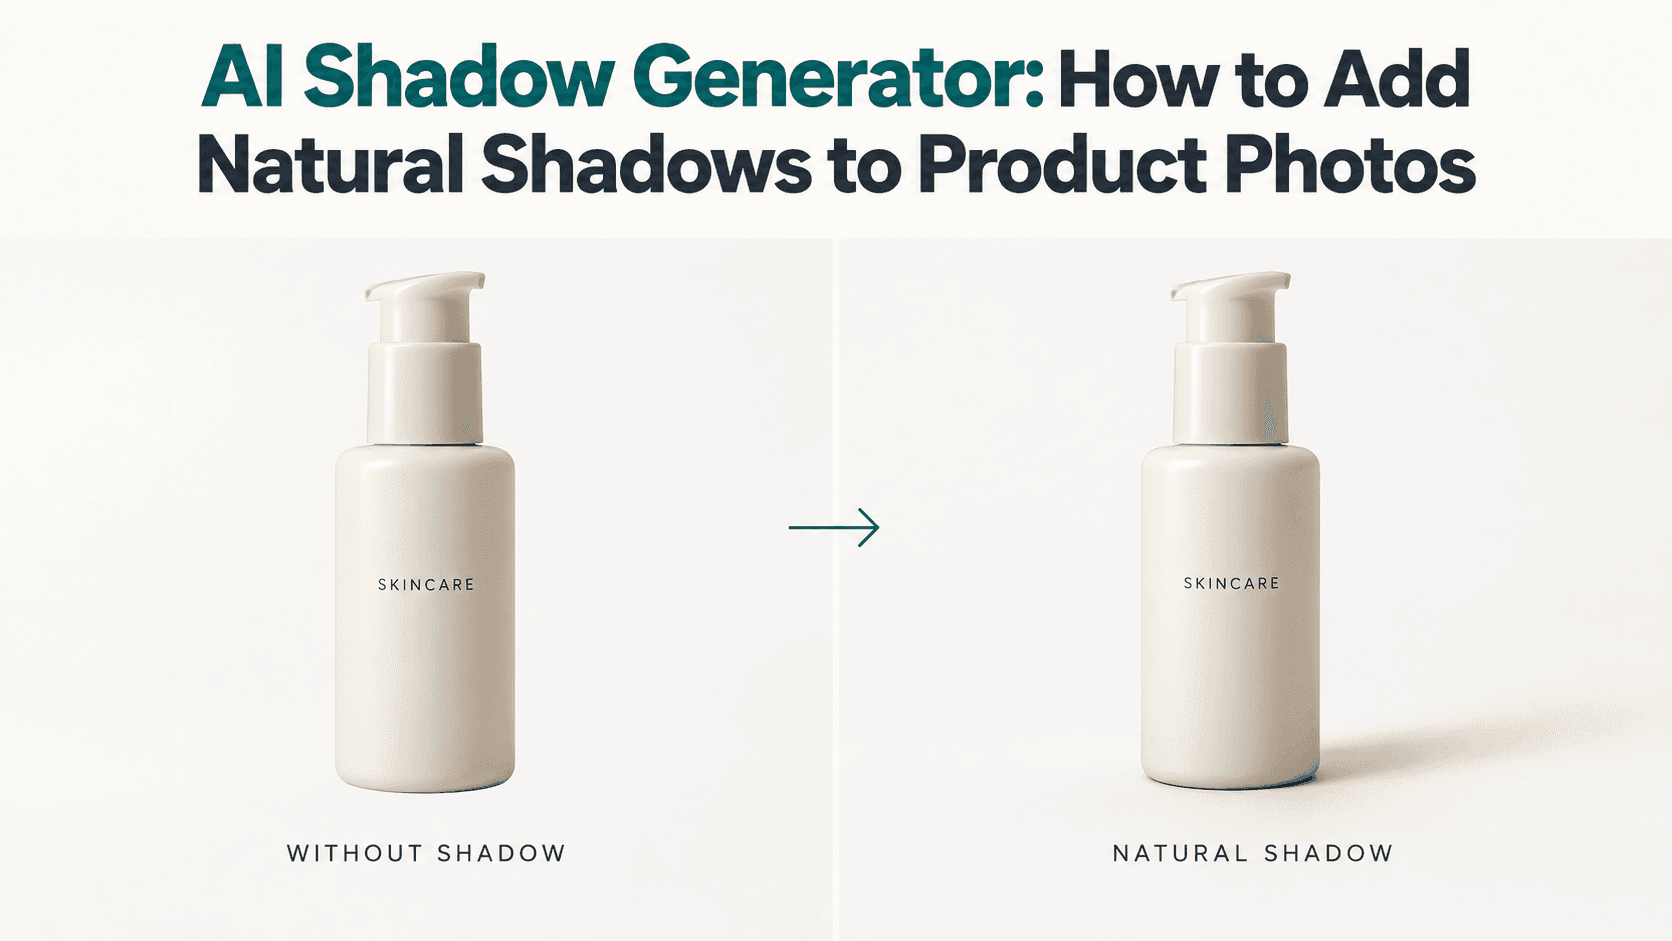
With clear labels and clean edges, the whole image still lacks a sense of realism. AI Shadow Generator can try to add shadows between the product and the desk, making the bottle appear to have a place to stand.
For this example, we'll use a photo of an opaque skincare bottle: the bottle is upright, with a white background and desk. The packaging remains unchanged, the camera angle stays the same, and only the shadows around the bottom of the bottle are edited.
Before Using AI Shadow Generator, Determine the Direction of the Light
First, check which side of the bottle is brighter, where the cap has highlights, and whether the bottom already has a slight shadow.
Assuming the main light comes from the upper left, the shadow cast on the desk will typically extend to the right. When giving instructions to the AI Shadow Generator, follow the original image's light direction. Don't just specify a direction because it looks good.
However, highlights don't reveal the entire light source. Metal reflections, multiple light sources, or other factors can complicate the judgment. If you can't determine the direction of the light, you can first ask the AI Shadow Generator to create a short shadow close to the bottom, rather than adding long, slanted shadows immediately.
First, Clarify Where the Bottle is Placed
Simply saying "add a realistic shadow" isn't enough. The AI Shadow Generator still needs to guess whether the product is placed on the desk, leaning against a wall, or hovering in the air.
In this example, you can specify "matte white desk" and request to retain the bottle's position and shooting angle.
Pay special attention to the small dark area where the bottom of the bottle touches the desk, known as the contact shadow. If the AI Shadow Generator leaves a white gap at the bottom of the bottle, even if the surrounding shadows look perfect, the bottle might still appear to be floating.
After leaving the bottom, the shadow can gradually become softer and fainter. There's no need to use the same dark gray from top to bottom.
Starting Prompt for White-Bottom Product Images
Reveedo's AI Image Editor allows you to upload the original image and describe the lighting and editing requirements with text. You can try the AI Shadow Generator prompt within this process without assuming there's a separate shadow button on the page.
Using this skincare bottle photo as an example:
Add natural shadows to this skincare bottle, placed on a matte white desk. Match the soft lighting from the upper left of the original image. Add a small contact shadow directly below the bottle's bottom, followed by a short, soft shadow extending to the right with gradually fading edges. Preserve the bottle's shape, cap, label text, logo, color, position, and shooting angle. Do not add props or mirror reflections.
This AI Shadow Generator prompt clearly separates what needs to be edited and what needs to be preserved, making it easier to check each item after generation.
However, specifying to retain the labels doesn't guarantee that the text will remain unchanged. Before using the result for product display, always compare it with the original image.
Where is the problem, fix it there first
If the AI Shadow Generator generates a large mass of dark gray, first adjust the lighter, outwardly extending shadows, keeping that touch shadow at the bottom of the bottle:
Dim the projection on the right side of the bottle, keeping the slight touch shadow at the bottom. Keep the rest of the product and background unchanged.
If the AI Shadow Generator places the shadow on the left, change it explicitly to the right. Continue adding words like "realistic, natural, advanced," without telling the model where it went wrong. First, examine it clearly, then make adjustments.
When two shadows appear, also check if the original shadow is still there and if a new one has appeared next to it. You can ask to merge them into a shadow consistent with the existing light, then check if the bottom of the bottle is touching the table.
If the shadow is too long, first ask to shorten it, don't change the entire scene's lighting in the process. Product display images usually don't need exaggerated dramatic effects; first, ensure the packaging is clear.
Each time you modify the AI Shadow Generator's result, solve one specific problem first. Changing direction, depth, and length together makes it hard to know which one improved the image.
Shadows and reflections are not the same thing
In reflections, you might see the bottle and label upside down; shadows are just the dark areas where light is blocked.
In this example, it uses a matte surface, so the AI Shadow Generator should not place an mirrored label underneath the bottle. If it does, keep the requirement "no mirror reflections."
Transparent glass bottles need to be handled separately. Light passing through glass and liquid may create bright spots or colored shadows; a solid, solid gray shadow may not be suitable. For the first practice with the AI Shadow Generator, use an opaque bottle—it's easier to understand the problems.
Don't choose a too complex first practice image
First, pick a photo where the bottom is clear and the lighting is easy to judge, then hand it to the AI Shadow Generator for a try. An upright bottle is easier to check than a tangled necklace, avoiding the need to handle many small gaps at once.
Keep the background unchanged for the first time. Once the shadow is right, then consider changing the table or setting.
Change the prompt when switching to a box
For a paper box, you can give the AI Shadow Generator instructions like:
On the existing matte surface, add a slight contact shadow to the bottom of the paper box, matching the original packaging lighting. Keep all corners, printed text, colors, and proportions, and do not add reflections.
The shadow of the box should meet the bottom edge, not directly copy the circular dark area under the bottle, or the corners might look like they are lifting.
When checking the AI Shadow Generator's result, look around the bottom edge. If switching to a round can, check the curved bottom. Different products require different fitting positions.
Once the shadow is done, has the packaging been changed?
Place the AI Shadow Generator image side by side with the original image, enlarged, and check the label letters, cap width, bottle outline, and product color.
If the packaging must be completely accurate, use an editing method that protects the product area, or composite the original product onto the improved background. Relying solely on text instructions cannot lock every pixel.
Then, shrink the AI Shadow Generator image to the actual size of the product card. Soft shadows in the large image may turn into a dirty gray when scaled down.
Keep the original image, the edited large image, and the website upload version saved separately. For the same set of products, try to maintain consistent lighting direction to ensure they look like they were shot in the same room when listed.
When finalizing the AI Shadow Generator effect, don’t just focus on the shadows. If the bottles appear stable on the table and the shadows don’t distract from the packaging, you can finish.