



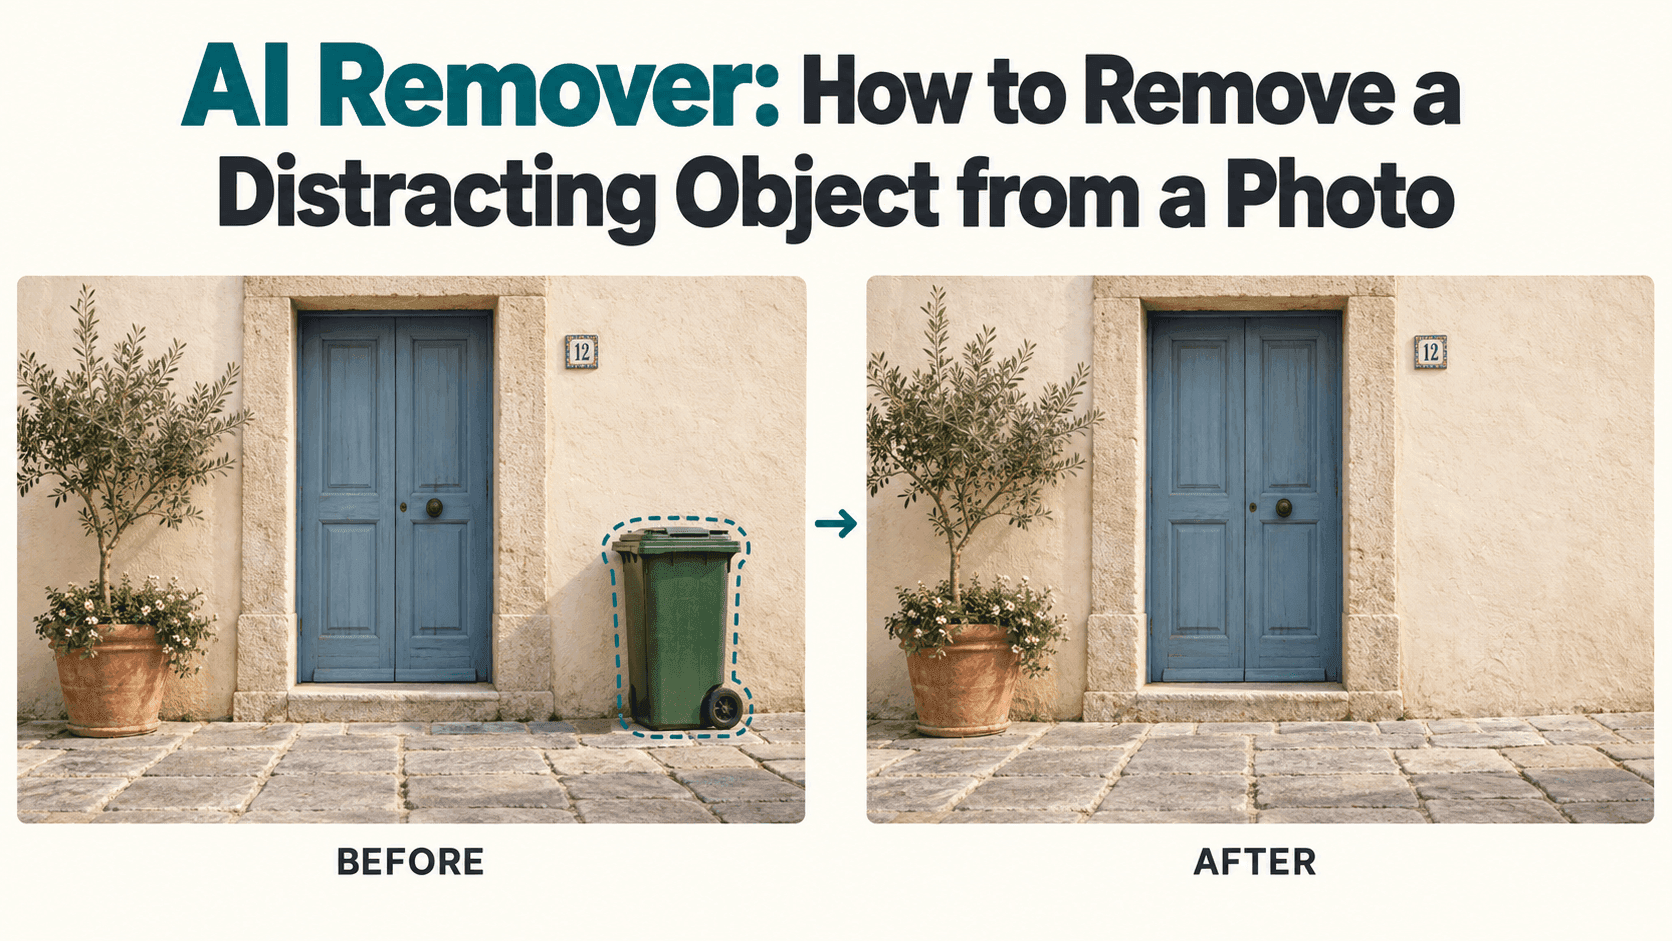
AI Remover: Remove Distracting Objects from Photos
AI Remover: How to Remove a Distracting Object from a Photo
There is always something you notice after taking the photo.
A bin beside a lovely doorway. A paper cup on an otherwise clear table. A cable running through the corner of a room you have just tidied.
Sometimes a crop takes care of it. Sometimes cropping also removes the part you wanted to keep. An AI Remover gives you a way to remove the distraction and fill the space it occupied. Whether the result works depends less on making the object disappear than on what appears in its place.
Let’s take a street photo with a green bin beside a doorway. The doorway belongs in the picture. The bin does not.
What an AI Remover Needs to Fill the Gap
Before uploading the photo, look around the bin.
If it sits against a plain wall, with paving stones underneath, you have a fairly clear idea of what should replace it. The wall continues down. The paving continues across. The line between them stays where it is.
Now imagine the same bin standing in front of a painted sign. Removing it would expose letters that the photo never captured. The tool could invent something convincing, but it would not know what the sign actually said.
That is the first decision worth making: does this edit need a believable background, or an accurate reconstruction?
For a personal travel photo, a plausible patch of paving may be enough. For lettering, artwork, or an important architectural detail, another photograph could be more useful than a longer prompt.
Start with the Photo You Actually Want to Keep
Use the original file if you still have it. A screenshot may look fine on your phone while hiding the texture and edges that become important during editing.
Save a copy, then choose one thing to remove.
In our example, that means leaving the bicycle and plant beside the doorway alone. If you remove the bin, bicycle, plant, and sign together, you are no longer making a small correction. You are redesigning the scene.
There is nothing wrong with redesigning a scene when that is the intention. It just makes judging this first edit harder.
Keep the framing as it is, too. You can crop later, once you know whether the repaired corner looks right.
Write the Request as If You Were Pointing at the Picture
“Remove the unwanted object” feels clear when you are looking at the photo. The editor still needs to know which object you mean.
Name it, describe its position, and say what should fill the space:
Remove the green bin in the lower right corner. Continue the existing wall and paving stones through the removed area. Match the surrounding texture, perspective, and daylight. Keep the doorway, bicycle, plant, and framing unchanged. Do not add anything new.
This is a useful starting point for an AI Remover request because it leaves little doubt about the target.
You can try a source image and written editing instructions in Reveedo’s AI Image Editor. Check the controls available in your selected mode. If it offers a selection brush, mark the bin while avoiding the nearby doorway. If it relies on text alone, the location and color in your prompt become especially helpful.
Do not add requests for brighter lighting, richer colors, and a cleaner wall yet. Those are separate edits, and they can change the photograph more than you intended.
The Bin Is Gone. Look at the Ground.
The first result may look good simply because the green distraction has disappeared.
Give your eyes a moment to adjust, then follow the paving joints into the repaired area. Does one stop halfway across a stone? Does another turn at an odd angle? Is the new patch smoother than the ground around it?
Look at the wall next. A repair can match the color and still get the texture wrong. A patch with no grain, stains, or variation may stand out against the original surface.
Check the join between wall and pavement as well. It should continue through the space where the bin used to be.
You do not need to inspect every pixel indefinitely. Look closely once, then view the whole photo at the size you intend to share it. A tiny irregularity may disappear at that size. A bright patch in the corner probably will not.
Remember the Shadow, but Check Whose Shadow It Is
An empty space with a bin-shaped shadow still looks occupied.
If the original bin casts a clear shadow, include that in the removal request. Be specific:
Also remove the short shadow cast by the bin beside its base. Keep the doorway’s shadow unchanged.
This matters when shadows overlap. Asking the editor to remove every dark area nearby could flatten the doorway or make the pavement look strangely lit.
Reflections deserve the same attention. A cup removed from a glossy table may still appear in the tabletop. Check for those traces before deciding the edit is finished.
Ask for the Correction You Can See
If there is a green edge left behind, say so.
Remove the remaining green strip along the repaired area. Match the adjacent wall texture and leave the rest of the image unchanged.
If a paving joint bends, describe the joint. If the wall becomes too smooth, describe the missing texture.
“Make it more realistic” does not identify any of those problems. It invites another broad interpretation when you already know which small detail needs work.
If the doorway or bicycle changes, return to the original file. Trying to repair an unwanted change on top of the removal can make the process increasingly difficult to follow.
Some Objects Are Better Left for Another Photo
A bin in front of a wall is one thing. A cup held across somebody’s face is another.
Removing the cup means generating facial features that were not visible. The result can look like a real face without looking like the right person.
The same caution applies to hands hidden behind bags, lettering covered by stickers, and detailed patterns obscured by furniture. A plausible replacement is not necessarily an accurate one.
Before spending more time on those edits, check whether you have another shot from the same moment.
Stop When the Photo Works
Save the edited version separately from the original. Check the downloaded image, not just the preview, and make sure it is large enough for its intended use.
For documentary, evidentiary, or other accuracy-sensitive uses, preserve the original and disclose meaningful changes.
For our street photo, the goal is simpler: your eye should return to the doorway. The corner should no longer demand attention.
Once that happens, there may be nothing else to fix.