



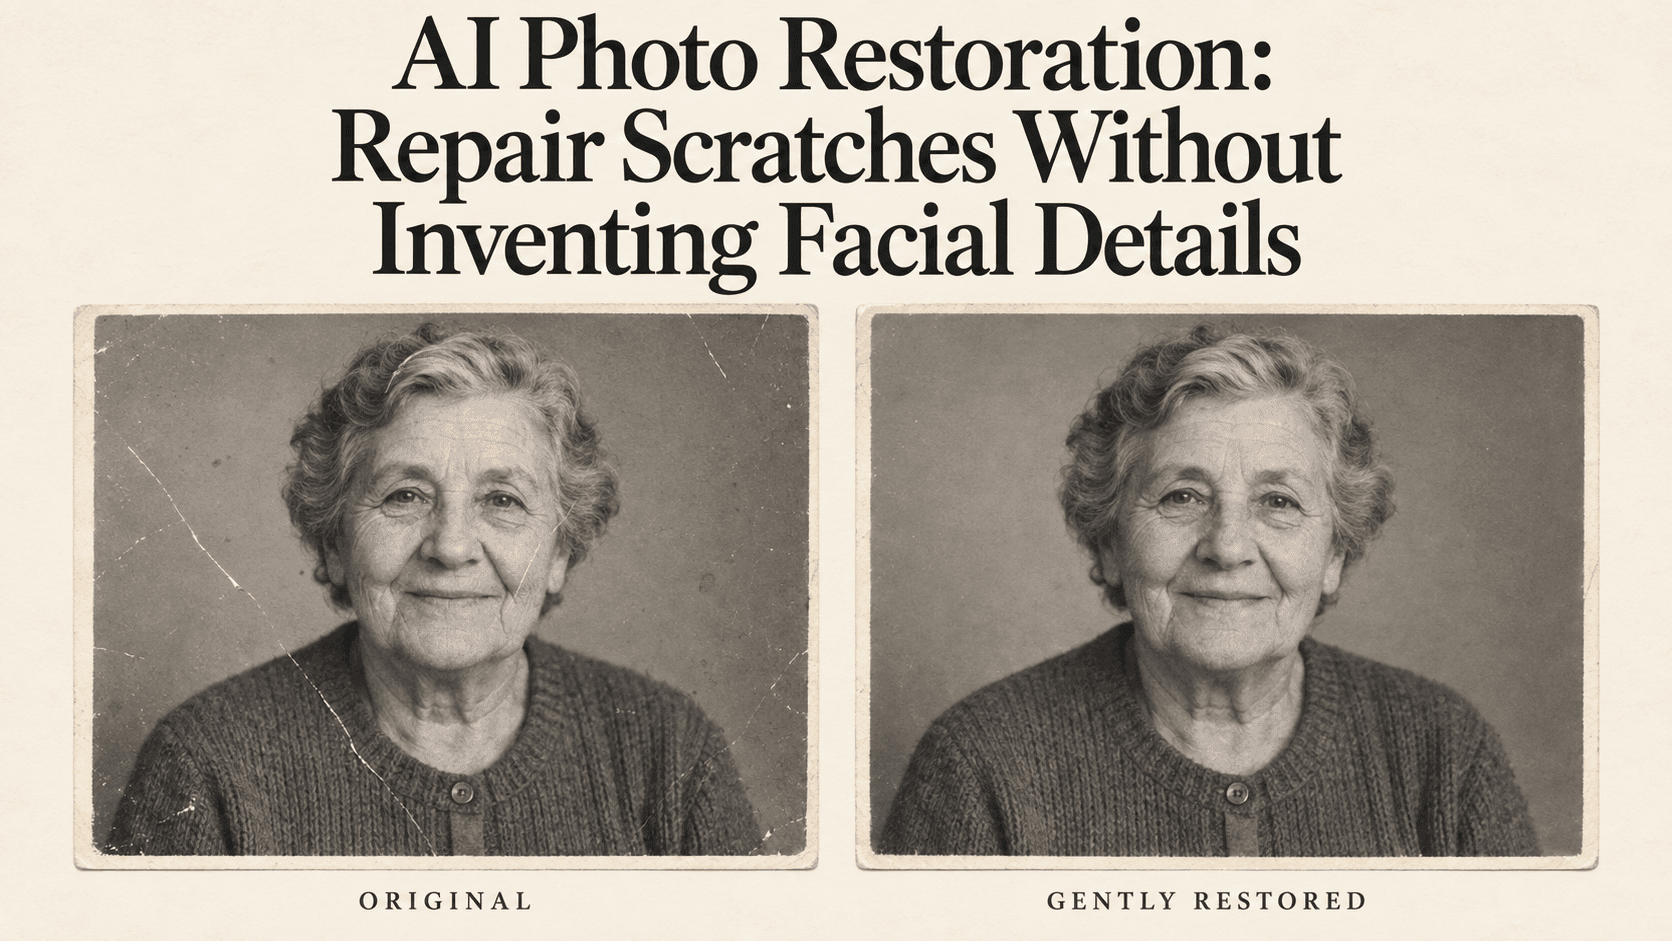
AI Photo Restoration: Repair Scratches, Keep Faces Familiar
AI Photo Restoration: Repair Scratches Without Inventing Facial Details
The scratch is gone. So are a few wrinkles. The eyes look brighter, the teeth look straighter, and somehow the person in the photograph no longer looks quite like your grandmother.
That is the part of AI Photo Restoration worth being careful about. Removing visible damage and rebuilding a face are different jobs, even when an editor does them in the same pass.
For a family photograph, the goal is usually modest: make the picture easier to look at without changing the person you remember. A little softness is fine. A different smile is not.
Start by deciding what AI Photo Restoration should leave alone
Take a moment to look at the photograph before editing it. Not the scratches. The person.
Perhaps one eye is slightly more closed than the other. Perhaps the smile is crooked, or a few strands of hair fall across the forehead. Those details are easy to lose when a tool tries to make a portrait cleaner.
It helps to make a short note: “Keep the expression, eye shape, hairline, and age exactly as shown.” This is a useful direction for AI Photo Restoration, though it is not a guarantee that the software will follow it perfectly.
There is also a difference between damage and the way an old photograph was made. Soft focus, visible grain, and deep shadows may belong to the picture. They do not all need fixing.
A better copy can save you a lot of editing
If the original print is available, start there. A clear scan gives you a better starting point than a screenshot of a photograph someone sent years ago.
You can also photograph the print. Keep the camera facing it straight on, use even light, and watch for reflections. If glare covers an eye, an editor cannot see through it simply because you ask for more detail.
Save an untouched copy before starting AI Photo Restoration. Give the edited version a separate filename so there is no chance of confusing the two later.
For family pictures, check the service’s privacy settings and upload terms as well. A photograph can be precious without being something everyone in it wants shared online.
Fix the wall before you fix the face
Imagine a portrait with a white scratch running down the background, across a shoulder, and stopping near the cheek.
It is tempting to ask for complete old photo restoration in one go. A more manageable first attempt is to deal with the background and clothing, then inspect what happened to the rest of the image.
Try a prompt like this:
Remove the thin white scratch from the wall and jacket. Leave the face, expression, hair, and clothing design unchanged. Match the repaired area to the surrounding black-and-white tones and visible grain.
That gives AI Photo Restoration a specific job. It is more useful than “restore this photo in perfect detail,” which leaves a lot of room for interpretation.
If your editor offers a selection or mask, use it to mark the damage. Otherwise, check the entire result. An instruction to edit the jacket does not necessarily prevent a generative editor from changing something elsewhere.
Pay attention to small things: a button disappearing, a collar becoming a different shape, or a strand of hair turning into a dark smudge.
A scratch across an eye needs a different decision
A thin line across a cheek and a missing section of an eye are not equivalent problems.
The cheek may have enough surrounding tone and texture for a discreet repair. If a tear has removed an eyelid, part of the eyebrow, and the corner of the eye, there is much less information left. AI Photo Restoration may produce something believable, but believable is not the same as correct.
For a small facial scratch, keep the request narrow:
Repair the narrow scratch on the cheek. Match the nearby tone and grain. Preserve the visible facial contours and expression. Leave unclear details soft rather than adding new definition.
Notice what is missing: “beautiful,” “flawless,” and “ultra-detailed.”
Those words do not help explain the damage. They can also encourage a result that looks more like a newly generated portrait than a repaired photograph.
If a large part of the face is missing, another photograph of the same person can help you judge the resemblance. It still cannot tell you exactly what the hidden expression looked like in that moment.
Sometimes the sensible choice is to leave a little damage visible. Sometimes it is to make a reconstructed version and clearly label it as such. Neither requires pretending that missing information has been recovered.
Do not polish away the photograph
One common problem with AI Photo Restoration is a repaired patch that looks too clean.
The background still has grain, but the cheek is smooth. The hair is soft, but the new eye is sharply defined. Each part may look acceptable on its own; together, they do not quite belong.
Instead of asking for more sharpness, ask the editor to match what is already there:
Keep the original softness and grain. Blend the repaired area into the surrounding photograph. Do not smooth the skin or increase facial sharpness.
Check the clothes too. A textured coat should not become shiny. Lace should not turn into a solid white shape. These details can tell you that the edit has gone further than scratch removal.
Color is another separate choice. You can finish AI Photo Restoration and leave the picture in black and white. Adding a guessed dress color does not make the repair more complete.
Compare the expression, not just the damage
When the result appears, the missing scratch will probably catch your attention first. Look past it.
Put the original and edited image beside each other at the same size. Does the mouth sit the same way? Are the eyes looking in the same direction? Has the person become younger?
Then zoom in on the repair. Look for a sudden change in texture, a repeated pattern, or an edge that does not connect properly.
If the face has changed, go back to the original. Narrow the AI Photo Restoration request rather than repeatedly editing the altered version. Otherwise, you can end up working on a face that has already drifted away from your reference.
On Reveedo, the AI image editor provides a prompt-based starting point. Upload a copy and describe a limited repair. How closely the result preserves the source depends on the image, prompt, and selected model; review it rather than assuming the untouched areas stayed untouched.
The best version may not be the cleanest one
A faint crease is not necessarily a reason to generate again.
If the picture looks clearer, the repair blends in, and the person still looks familiar, you may already have the version worth keeping. Another pass could remove the crease and change something more important.
Save the original alongside the finished AI Photo Restoration. If you reconstructed a damaged facial feature, make a note of that too.
The photograph does not need to look as though it was taken yesterday. It needs to remain a photograph of the person it was taken to remember.