



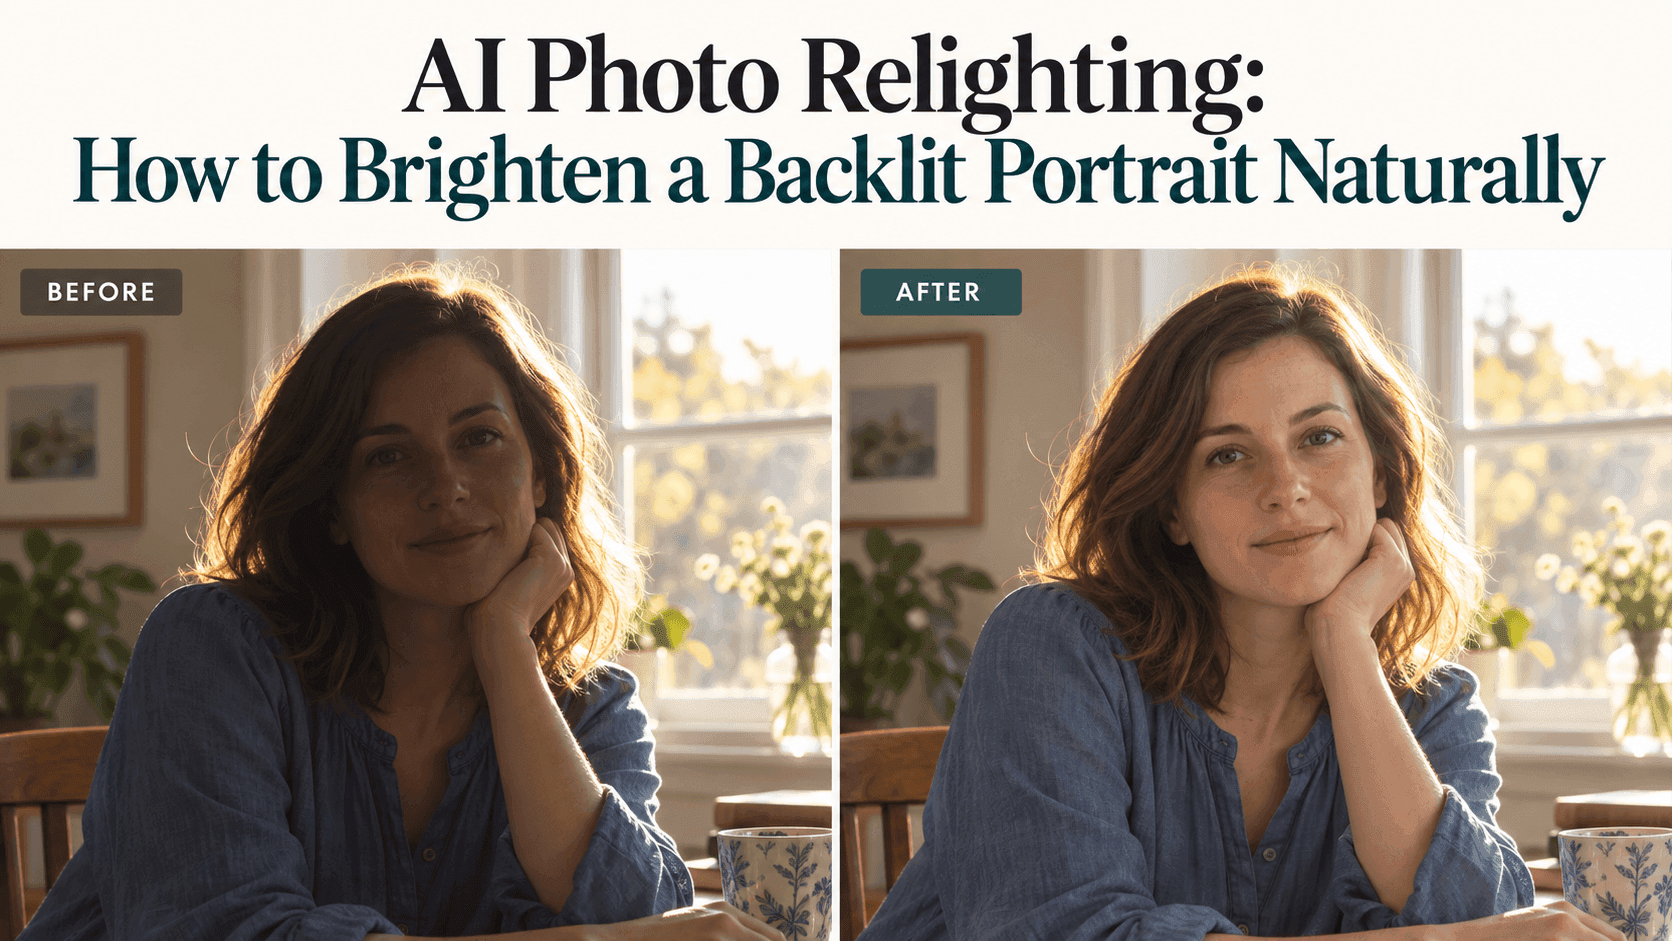
AI Photo Relighting: Brighten Backlit Portraits Naturally
AI Photo Relighting: How to Brighten a Backlit Portrait Naturally
You take a portrait by a window. Outside, the trees look lovely. Inside, the person’s face is so dark that you can barely see their expression.
The obvious fix is to brighten the photo. Except now the window turns white, the room loses its shadows, and the face still doesn’t look quite right.
This is where AI Photo Relighting can be useful. Instead of asking for a brighter photograph, you can ask for more light in a particular place. For a backlit portrait, that usually means a little more light on the face, with much less change to the background.
The difficult part isn’t making the face bright. It’s making the extra light look as though it was there when you took the picture.
Before AI Photo Relighting, Look at What the Photo Actually Contains
Open the original image and enlarge the face. Don’t edit anything yet.
Can you see the shape of the eyelids? Is there still texture in the cheeks? Can you make out where the lips meet? If those details are visible but dark, there is something to work with.
If the face is a blurred patch with almost no readable detail, be more cautious. AI Photo Relighting may produce a convincing face, but convincing doesn’t necessarily mean accurate. An eye that appears after editing might be a generated interpretation rather than a recovered detail.
That matters particularly with family photographs. A technically prettier image isn’t an improvement if the person no longer looks like themselves.
Use the original file where possible. A screenshot from a messaging app gives you less to inspect and may contain compression artifacts before you even begin.
Also, consider whether you need a generative edit at all. If the face is only a little dark, a selective exposure adjustment may be sufficient. Adobe’s guide to masking describes how local adjustments can target part of a photograph without changing everything around it.
Describe the Missing Light
“Make this portrait better” leaves too much open.
Better could mean smoother skin, a different color treatment, a blurred background, or a brighter face. Only one of those solves the problem you came with.
For AI Photo Relighting, describe where you want the extra light to come from. With a window behind the person, try soft fill from near the camera. Think of someone holding a white reflector in front of them, just outside the frame.
Here is a starting prompt:
Gently brighten the shaded face with soft fill light from near the camera. Keep the window, background brightness, and original backlight unchanged. Preserve the person’s facial features, expression, skin tone, and visible skin texture. Leave soft shadows beside the nose and under the chin.
This is an example to adapt, not a promise that every editor will follow it exactly.
The useful part of this AI Photo Relighting prompt is the limited request. It asks for a lighting adjustment without inviting a beauty makeover.
If the first version looks too polished, don’t immediately add ten more instructions. Remove anything that might be asking for retouching. Words such as “flawless,” “glamorous,” and “perfect” don’t explain where the light should go.
A Brighter Face Still Needs Shadows
There is a point where lifting shadows stops helping.
The face becomes evenly bright, but the cheeks lose their shape. The nose looks flatter. The jaw seems less distinct from the neck. Nothing is obviously broken, yet the portrait feels strangely artificial.
An AI Photo Relighting edit should leave some difference between the lit and shaded parts of the face.
Look beneath the chin. There should usually still be a shadow there, depending on the original lighting. Look beside the nose, too. You don’t need to erase that shading to make the person easier to see.
For a more restrained AI Photo Relighting revision, try:
Reduce the added fill light. Keep the face readable, but restore gentle shading around the cheeks, nose, and neck. Preserve the original direction of light.
Check the photograph at its normal viewing size afterward. A face that looks slightly dark when enlarged may look perfectly believable in the whole composition.
Don’t Let “Brighter” Become “Paler”
Watch the skin color as you compare versions.
A face can appear lighter because its exposure increased, because its color changed, or because skin texture was smoothed away. Those are different edits, even if they initially look similar on a small screen.
When reviewing AI Photo Relighting, check the face against the neck and any visible hands. They won’t necessarily have identical brightness, but they should still look as though they belong to the same person in the same scene.
Sunset photographs need particular care. Warm light is part of what makes them attractive. Removing every trace of yellow or orange may leave a face that looks oddly cool against the background.
If the color is genuinely too strong, give AI Photo Relighting a narrower correction:
Slightly reduce the orange cast on the face. Keep the warmth of the sunset and the person’s original complexion. Do not whiten or smooth the skin.
You’re correcting an unwanted cast, not choosing a new skin tone.
The Hairline Often Tells You More Than the Cheeks
A relit face may look fine until you check its edges.
Look around the hair, ears, glasses, and shoulders. A pale outline can make the person appear cut out. Fine strands may disappear. An earring might acquire a different shape.
These details are worth checking after AI Photo Relighting because they sit where the person meets the background.
Then compare the expression. Did the corners of the mouth move? Are the eyes a different shape? Does the face look slimmer?
If so, the edit has gone beyond lighting. Go back to the original rather than treating the altered version as your new source.
For your next AI Photo Relighting attempt, ask for a smaller change. If the tool repeatedly alters important details, use a local exposure adjustment instead. A less dramatic result may be the better photograph.
Make One Test in Reveedo Before Editing a Whole Set
Reveedo’s AI Image Editor accepts uploaded images and written instructions for changes, including lighting adjustments. The result depends on the image, prompt, and model, so preservation needs to be checked rather than assumed.
Start an AI Photo Relighting test with one photograph. Choose a reasonably clear portrait and describe only the lighting problem.
Don’t combine that first request with a new background, different clothes, skin retouching, and a cinematic color grade. If the result goes wrong, you won’t know which instruction caused it.
Save the original beside the AI Photo Relighting result. Compare both at the same size, preferably without switching between different screen brightness settings.
If the face is now readable and the background still looks familiar, you may already be finished.
Know When to Leave It Alone
It’s easy to keep editing because each version looks a little brighter.
But brighter isn’t always closer to the photograph you wanted. A portrait beside a window can retain some shade. A sunset picture doesn’t have to reveal every pore.
The best AI Photo Relighting result may be the version that barely announces itself: you can see the person’s expression, their skin still has texture, and the light belongs to the setting.
Before saving, ask one simple question: did you improve the visibility, or did you change the person?
Keep the version that solves the first problem without creating the second.