



AI Middle Part vs. Side Part: Compare Both in the Same Photo
AI Middle Part vs. Side Part: Compare Both in the Same Photo
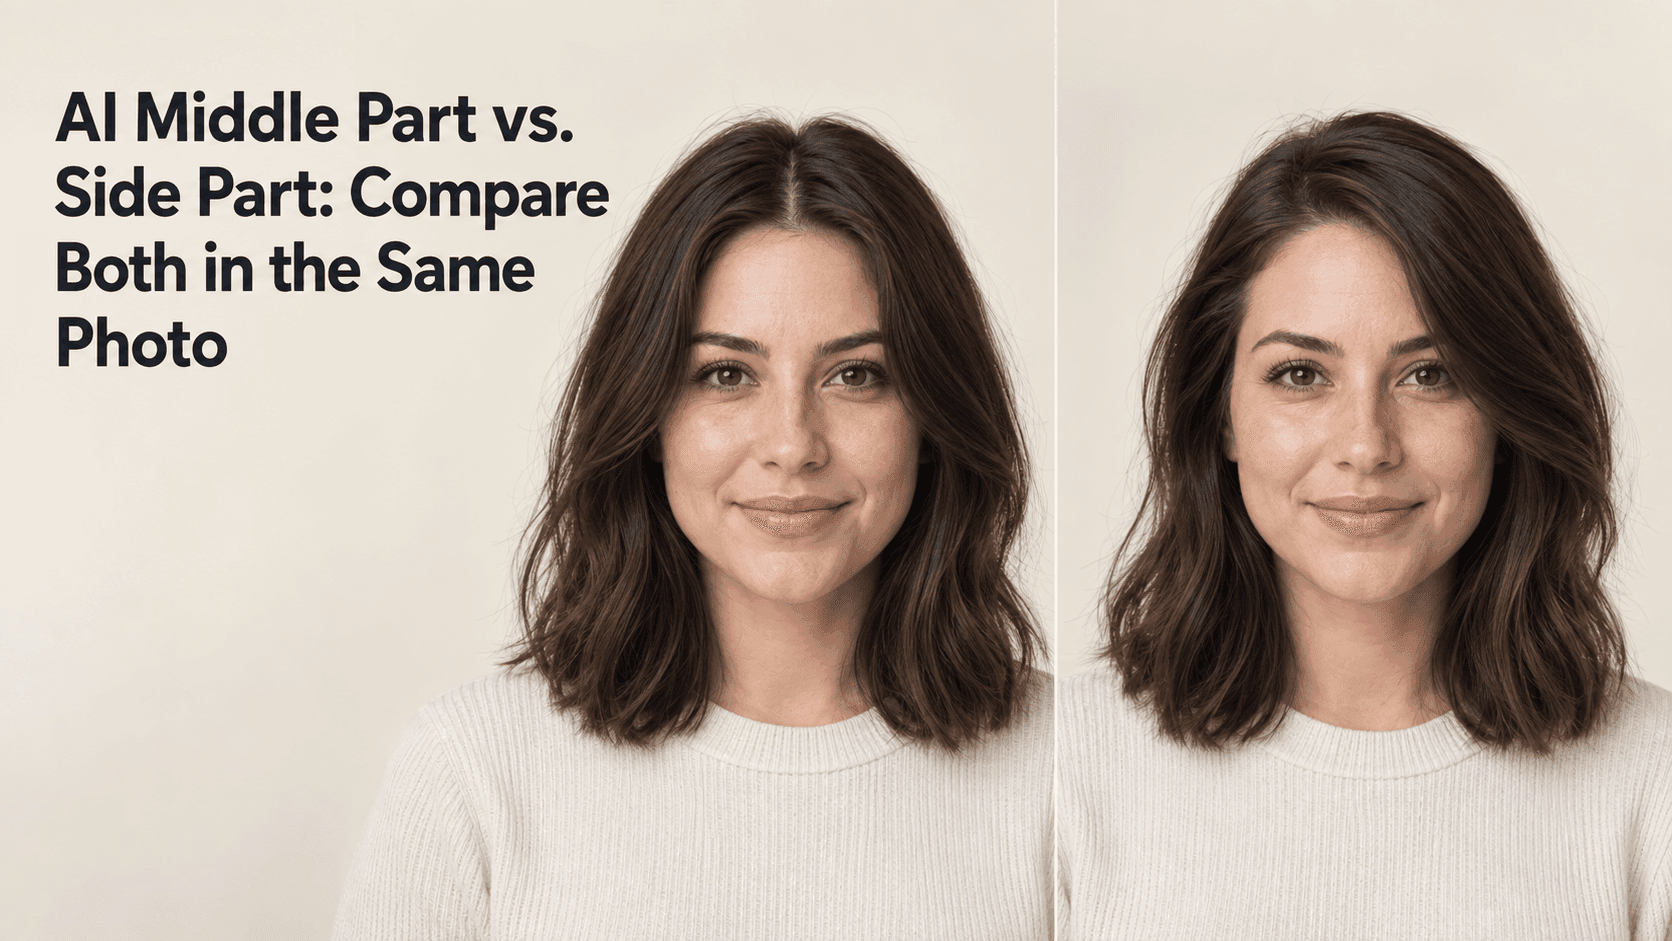
You do not need a new haircut to find out whether a middle part or side part feels more like you. An AI Hairstyle Changer can make a useful side-by-side preview from one portrait, as long as you keep the comparison fair: same photo, same length, same texture, and one change at a time. A middle part is easiest to judge when the side part uses the same basic style.
The part itself may be a small detail, but it changes how the hair frames the forehead, temples, and cheeks. A good comparison helps you notice those differences without getting distracted by a new color, a different face shape, or salon-style retouching. Try the middle part first, then compare it with a side part.
Use an AI Hairstyle Changer to Compare the Part, Not Your Whole Face
Start with a recent photo taken from the front or at a slight angle. For a middle part preview, the roots and forehead should be visible. Your hairline should be visible, and your hair should not cover most of the forehead. That is particularly helpful when judging a middle part. Soft, even light makes it easier to judge where the part begins and how the hair falls on either side.
A photo with a strong shadow across the forehead can make one version look heavier than it is. So can a hand resting on the hair, a hat, or a strand covering one eyebrow. You can still try the image, but treat the preview as a rough comparison if important parts of the hairline are hidden.
Before you upload anything, decide what you want to compare. If the question is “middle part or side part?”, keep the hair length, color, texture, and overall volume as close as possible. The middle part should be the only meaningful change. Changing all of those at once makes it hard to tell which detail you actually prefer.
That is the main advantage of an AI Hairstyle Changer for this task: it lets you look at two versions built around the same portrait. You can see whether the middle part feels balanced beside the side part. It does not make either version a prediction of what a salon cut will look like in real life. Your natural part, cowlicks, hair density, and styling routine still matter.
Take a Consistent Photo Before You Compare
Choose a picture where the camera is roughly at eye level and both sides of the face are visible. This makes the middle part easier to compare with an off-center part. Pull the hair away from the forehead if it hides the roots, but do not flatten it so tightly that the photo no longer resembles how you normally wear it.
You do not need a professional headshot. A clear phone portrait can work well if the face is in focus and the light is not coming from one harsh direction. Avoid comparing one edit against a different selfie: even a small change in camera angle can alter how wide the forehead or cheeks appear, which may affect how you read the middle part.
If you wear glasses, leave them on in both versions. If you usually wear your hair tucked behind one ear, start with that same styling in each preview. The point is not to make the image perfect; it is to keep the conditions steady enough to make a useful choice.
Write Two Prompts That Change One Thing
Use the same base image for both generations. Change only the direction of the part, and keep the rest of the hairstyle consistent. In Reveedo’s AI hairstyle tool, choose a suitable hairstyle preview; if you are using a prompt-based image editor, these examples can help describe the result you want.
For a middle part hairstyle:
Give the person a natural middle part. Keep the current hair length, color, texture, and volume. Let the hair fall naturally on both sides of the forehead. Preserve the person’s face, hairline, eyebrows, expression, and background.
For the matching side part:
Give the person a natural side part, slightly left of center. Keep the same hair length, color, texture, and volume as the original. Let the hair sweep gently to one side. Preserve the person’s face, hairline, eyebrows, expression, and background.
“Left of center” is only an example. The middle part prompt should use the same restraint. If you want the part on the other side, say so. Avoid adding terms such as “more attractive” or “younger.” Those can encourage changes beyond the hairstyle and make the two images harder to compare.
An AI Hairstyle Changer may also adjust the hairline or move loose strands while creating the new part. Check that the roots still look plausible and that the hair has not been painted across the forehead. If the result changes the face or hair color, try a shorter prompt that asks for only the part direction. The middle part itself does not need extra styling adjectives.
Compare the Two Images Side by Side
Look at both previews at the same size, preferably next to each other. Place the middle part on one side and the side part on the other. Do not judge one as a large image and the other as a small thumbnail; scale changes can affect which version seems more balanced.
Start at the hairline and look at how the middle part begins. Does the middle part begin where your natural part could sit? Does the side part look like a gentle shift, or has it created a dramatic sweep you did not ask for? Then look at how the hair rests near the temples and cheeks. Notice the overall outline without assuming that one part is automatically better for a particular face shape. A middle part can feel very different with a few loose strands framing the face.
Check the details that can make an AI Hairstyle Changer result feel off, especially around the middle part: a part line that stops suddenly, roots that point in an impossible direction, hair that covers one eyebrow in only one version, or a texture that changes from straight to wavy without being requested.
The face should stay steady across both previews. If the middle part edit changes the forehead or eye shape, compare it again with the original. Compare the eyes, brows, jaw, and expression with the original photo. A flattering result is not useful if the tool has quietly changed the person. This can happen even when the middle part looks convincing. If something drifts, keep the original and try again with a more specific instruction.
It can help to ask someone who knows how you usually wear your hair, but first decide what you think. Otherwise, other people’s preferences can drown out the small practical question you set out to answer.
What the Preview Can and Cannot Tell You
A generated image is a styling reference, not a promise. A middle part preview cannot tell you exactly how your roots will fall after washing. It can show how a middle or side part might frame your face in that photo, but it cannot reproduce every strand, root pattern, or movement your hair will have after washing and styling.
An AI Hairstyle Changer works from the image and instructions it receives. If the original photo hides the hairline, the preview may invent a plausible one. If the image is very short, blurry, or strongly filtered, the tool has less detail to work with. A clean source photo usually gives you a more useful basis for comparison.
Hair also changes with everyday conditions. If your natural roots resist a middle part, the preview will not show how much styling it may take. A second middle part image with slightly softer volume can make the comparison more useful. Humidity, product, blow-drying, and the direction your hair naturally grows can affect whether a part holds. Use the preview to narrow down what you like, then bring the image to your stylist and ask whether your hair can be parted that way comfortably.
Make a Choice You Can Actually Use
After comparing the middle part and side part, save the version that feels closest to your usual style and note what you liked: more forehead visible, less hair over one eye, or a softer shape near the temples. These observations are more useful than simply deciding that one picture looks “better.”
If neither preview feels right, try a part slightly off center rather than switching immediately to a dramatic side sweep. You can also compare a loose middle part with a tucked-behind-the-ear version, but change only one extra detail at a time. Keep a note of which middle part version you prefer.
The best use of an AI Hairstyle Changer is to make a decision easier, not to make it for you. Use the middle part image to explain what you like to your stylist. Keep the original photo, compare the two edits under the same conditions, and treat the result as a conversation starter before changing your everyday look.