



AI Bangs Try-On: Compare Curtain, Blunt, and Side Bangs
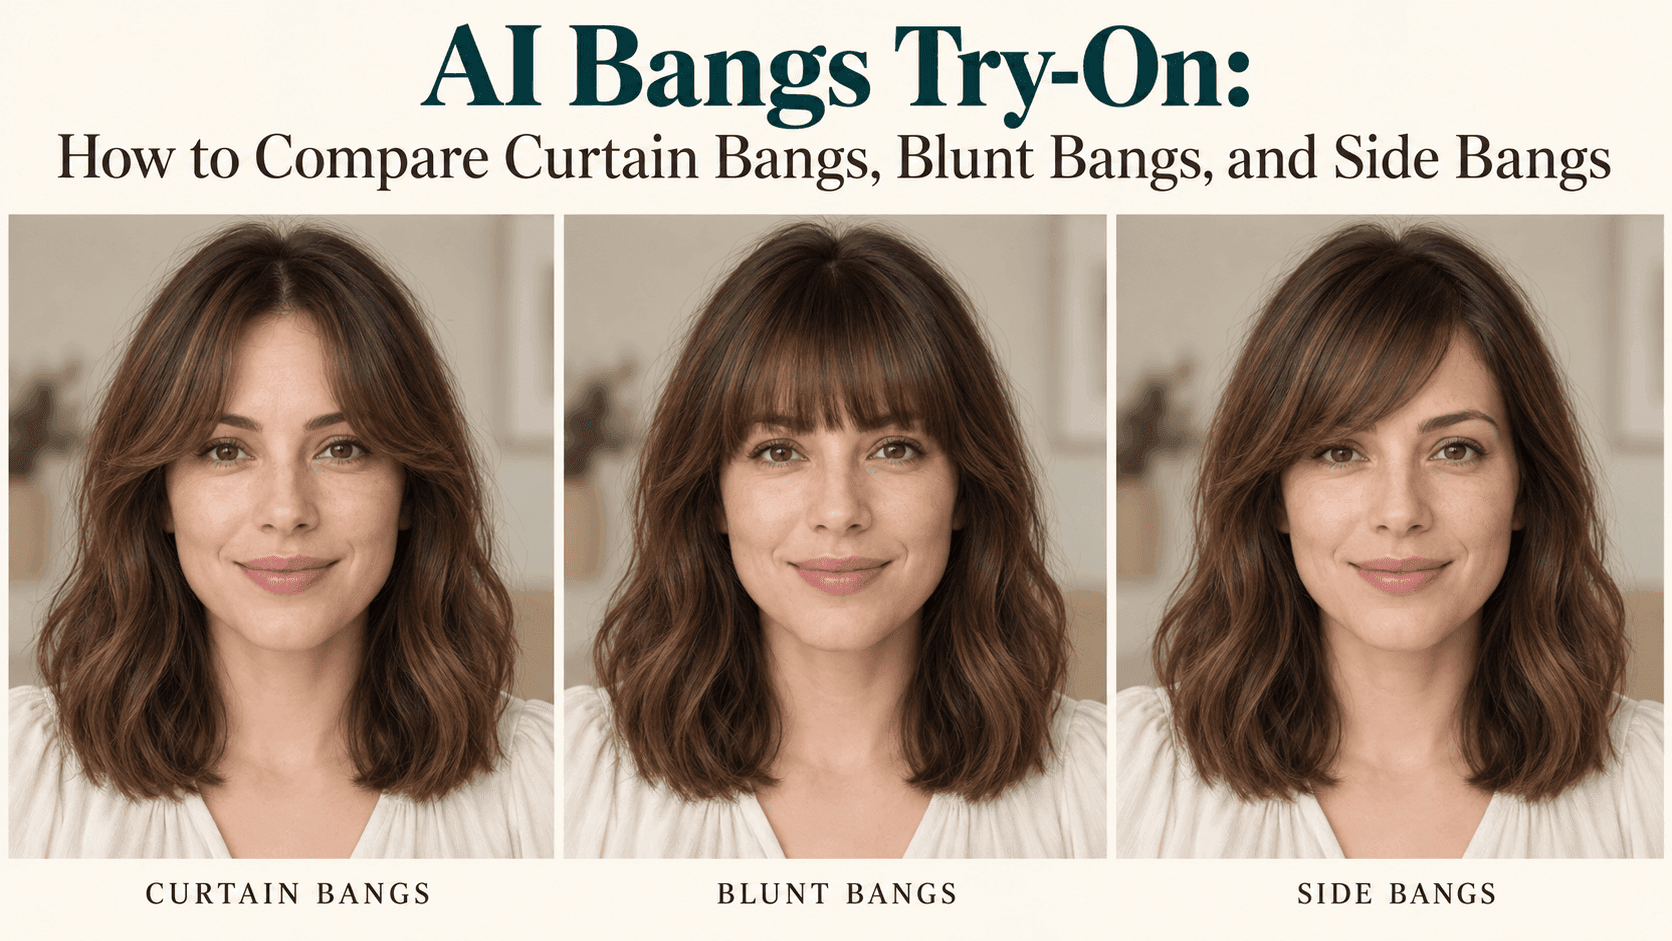
AI Bangs Try-On: How to Compare Curtain Bangs, Blunt Bangs, and Side Bangs
You’ve saved a few haircut photos. In one, curtain bangs fall neatly around someone’s cheeks. In another, a straight fringe makes an ordinary ponytail look completely different. You like both, which doesn’t make the decision any easier.
AI Bangs Try-On gives you somewhere to start. Instead of imagining someone else’s haircut on your face, you can compare a few versions of your own photograph.
The catch is that a convincing edit can be a little too convincing. It might add thicker hair, smoother skin, or a different jawline along with the bangs. Before deciding which style you prefer, make sure you’re still comparing the same person.
Start Your AI Bangs Try-On With One Ordinary Photo
Use a clear photo that looks like you on a normal day.
Face the camera at roughly eye level. Keep the forehead visible, and avoid a deep shadow across one side of the face. If your current front pieces cover the area you want to change, gently move them aside for the photo.
There’s no need to dress up or create salon lighting. In fact, your usual glasses and everyday hairstyle may make the preview more useful.
Use this same picture for all three styles. Keep the hair color, overall length, clothes, and background unchanged.
Otherwise, the comparison gets muddled. A curtain-bang version with glossy highlights and a full blowout may look better than a flatly lit blunt-fringe version for reasons that have nothing to do with the bangs.
Generate each option from the original photograph, rather than turning the curtain-bang result into the blunt-bang result. That gives every version the same starting point and avoids carrying an unwanted edit into the next one.
Curtain Bangs: How Much Forehead Do You Want to Show?
Curtain bangs open near the middle and fall toward the sides of the face. The name covers a range of lengths and finishes, so “add curtain bangs” can produce quite different results.
For a first comparison, ask for something specific:
Add light curtain bangs with a small center opening. Keep the middle pieces shorter and let the sides gradually reach toward the cheekbones. Match my existing hair color and texture. Keep my face, expression, remaining hair length, clothing, and background unchanged.
This is a starting prompt, not a tested guarantee.
When the image appears, look at the opening above your nose. Is it wider than you wanted? Does the fringe frame the face, or does most of it disappear into the rest of the hair?
Then look at the ends. If you like the general shape but not the length, change only that:
Keep the same curtain-bang shape, but make the side pieces a little longer.
You don’t need a completely new makeover every time something feels slightly off.
Also notice how much styling the picture suggests. A rounded, swept-out finish may be attractive, but a still preview cannot tell you whether your hair will sit that way after air-drying.
Blunt Bangs: Separate the Length From the Thickness
A straight fringe can make a bigger visual change than you expect. It introduces a clear lower edge across the forehead, even when the rest of the haircut stays the same.
Try:
Add straight-across bangs ending just above the eyebrows, with moderate thickness and a natural edge. Match the existing hair color and texture. Preserve the face, expression, rest of the hairstyle, lighting, and background.
Don’t reject the entire style immediately if the first version looks heavy. Work out what bothers you.
Is the fringe too thick? Too wide? Too close to the eyes?
Those are different adjustments. If the length looks right but the result feels dense, ask for less thickness while keeping the lower edge in the same place. If it covers too much of the eyebrows, try a slightly shorter version without changing the amount of hair.
Check the face as well. The editor should not move your eyebrows or reshape your forehead to make the fringe fit. If it does, that version isn’t a fair basis for choosing a haircut.
A useful preview helps you say, “I like this length, but I want a lighter edge.” That is much more precise than “I’m not sure about bangs.”
Side Bangs: Try the Direction You Actually Wear
Side bangs can be difficult to describe because “sweep left” depends on whose left you mean.
Use the photograph as the reference:
Add a light side-swept fringe moving from the left side of the picture toward the right. Let the ends blend into the existing hair. Keep the original hair color, texture, facial features, pose, and background.
Check the direction after generating. Don’t assume it was interpreted correctly.
If you usually part your hair on one side, start there. You can try the opposite direction afterward, but label the files so you know which is which.
Wear glasses most days? Keep them in the source image. Look closely at where the hair meets the upper corner of the frame. The picture can help you judge the appearance, although it won’t tell you whether those strands would touch the lenses or annoy you during the day.
The same applies to hair falling near your eyes. You may like it in a photograph and dislike it while reading or working.
Put the Three Versions Together Before Choosing
Looking at one edit at a time makes it easy to favor whichever one you opened last.
Place the original, curtain bangs, blunt bangs, and side bangs beside each other at the same size. An ordinary four-image collage is enough.
First, ignore the hair and check the face. The eyes, nose, jaw, expression, and skin should remain recognizable. If one version changes those noticeably, set it aside or regenerate it.
Then compare the fringe.
Which amount of forehead coverage feels comfortable? Do you like a defined edge or a more open shape? Does the style still appeal to you without a different hair color or extra makeup?
You don’t need to pick a winner immediately. Keeping two options is often enough to make the salon conversation easier.
If you want a second angle, repeat the comparison using another original photo. Don’t treat a front view of one style and a flattering angled view of another as equivalent evidence.
What to Do With the Preview in Reveedo
Reveedo’s image editor supports uploaded portraits and text-based restyling requests. You can use the prompts above as editing briefs, with results depending on the source image and selected model.
Save the original and the two versions you like most. Add a short note to each: “less thickness,” “longer at the sides,” or “keep this center opening.”
Bring those images to your stylist, but leave room for their assessment of your hair. Natural texture, growth direction, density, and the amount of styling you’re willing to do all matter. A generated picture doesn’t measure those things reliably.
The most useful outcome of AI Bangs Try-On isn’t a promise that you’ll look exactly like the preview. It’s arriving at the appointment with a clearer explanation of what you want—and what you don’t.